.png "Kodi Builds & Addons | Tech Tutorials | Everything Kodi Builds")
Watching Netflix on Kodi can be a challenge – especially since the link to the alelec repository, where the add-on could be found in the past, no longer works. Luckily, you don’t need that link to access Netflix on the latest version of Kodi.
In this article we walk you through how to add Netflix to Kodi 20 Nexus and explain why you should use a VPN to achieve this.
Why you Need a VPN and What to Look for?
It is possible to integrate Netflix into Kodi 20 Nexus without a VPN. However, doing so means that you are only able to access Netflix from your region; meaning that you are potentially missing out on the latest releases and other content that may not be available in your region due to licensing restrictions. Accessing Kodi and Netflix without a VPN also puts your connection at risk of hackers, viruses, malware, and surveillance.
However, not all VPNs can bypass the stubborn VPN blocks that Netflix has in place. Of those that can, few can create the fast, secure connection that you need to successfully access Netflix in any region. To achieve this, you need a VPN that has the following features:
- The ability to bypass VPN blocks
- Servers in the Netflix region you wish to access – servers in the US are a must if you want the latest shows and releases
- Fast speeds to reduce the risk of buffering and long waits for connections
- Excellent security including AES encryption and a no-logging policy
- Accessible customer services – just in case you need support with any aspect of your VPN
If you’re looking for a VPN that can offer you all this and more, don’t miss our list of the Best VPNs for Kodi Streaming.
Netflix Kodi Add-On Video Installation Guide
Netflix Kodi Addon Installation Guide:
- 1. Press the cog icon near the top left corner of the Home Screen.
- 2. Select File Manager.
- 3. Press Add Source.
- 4. Enter https://castagnait.github.io/repository.castagnait/ on the top box and repository.castagnait on the bottom one. Press OK to add the source.
- Now that we’ve added the link to the source, let’s use it to install the repository.
- 5. Go back to the Settings menu and select Add-ons.
- 6. Press Install from zip file.
- On Kodi 19, you’ll see a message about the auto-update feature. Press Yes to proceed.
- 7. Select repository.castagnait.
- 8. Click the file repository.castagnait-x.x.x.zip to download and install the repository.
- Now that the repository is installed, let’s use it to install Netflix and its dependencies.
- 9. Select Install from repository.
- 10. Click on CastagnaIT Repository to open the repository.
- 11. Select Video add-ons.
- 12. Now Select Netflix.
- 13. Press the Install button.
- 14. You’ll see a list of dependencies to be installed with the add-on. Press OK and wait until the process is finished.
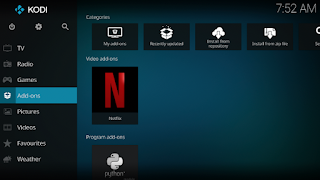
- 15. Go back to the Home Screen, highlight the Add-ons tab, and select
- Netflix Kodi addon
- On some Linux distributions, you must install a couple of additional libraries. On the other hand, if you’re using Windows, macOS, Android, LibreElec, CoreElec, or Ubuntu, those libraries are already installed.