.png "Kodi Builds & Addons | Tech Tutorials | Everything Kodi Builds")
This tutorial with step-by-step Instructions will show you How to Install Diggz Xenon Kodi Build on your preferred streaming device.
The Diggz Xenon Kodi Build is the most well-known of the several Kodi builds available on Diggz. All Kodi platforms, including those with minimal hardware like Firestick, Android TV Box are compatible with this kodi Build.

Diggz Xenon is a Debrid Kodi Build works like a charm with the integration of Debrid service to watch your favorute Movies and Tv shows.
Which Diggz Build is Best?
Diggz Xenon Kodi Build is one of the most popular Kodi Builds available, as it’s full of content, categories, and has a user-friendly interface.
For these reasons and more, Diggz Xenon Kodi Build is considered one of the Best Kodi Builds by Everything Kodi Builds.
Prior to installing any Kodi Build, we always recommend resetting Kodi to default settings. This can be easily done on any device you have Kodi installed on.
NEW: Diggz Xenon (FREE) Kodi Build
Install Diggz Xenon Step by Step Video Tutorial:
How To Install Diggz Xenon Kodi Build:
- Launch Kodi
- Click the settings icon

- Click System

- Hover over Add-ons menu item and turn on Unknown sources if not already on

- Click Yes

- Click back on remote to go back to the System page
- Select File Manager

- Click Add source

- Click <None>

- Type the following URL exactly as shown here: https://diggz1.me/diggzrepo/ or this URL: https://tinyurl.com/diggz123

- Highlight the box under the source that you just typed in and enter a name for this media source
- Type “diggzrepo” or any other name you would like to identify this source as and click OK

- Click the back button on your remote or keyboard until you are back on the System screen
- Choose Add-ons

- Click Install from zip file

- Click Yes

- Choose “diggzrepo” or another name you assigned the media source in the previous step

- Click the zip file URL – Diggz_Repo.zip

- Wait for the “Diggz Repository Build Wizard Add-on installed” message to appear. You may have to be patient for a minute or two

- Click Install from repository

- Select Diggz Repository

- Select Program Add-ons

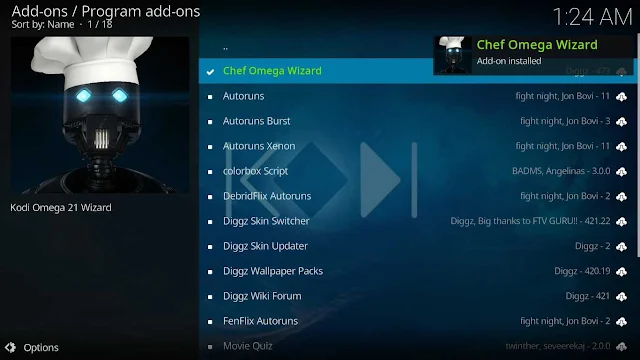
- Select Chef Omega Wizard or Chef Nexus Wizad if you use Kodi 20 Nexus.

- Click Install

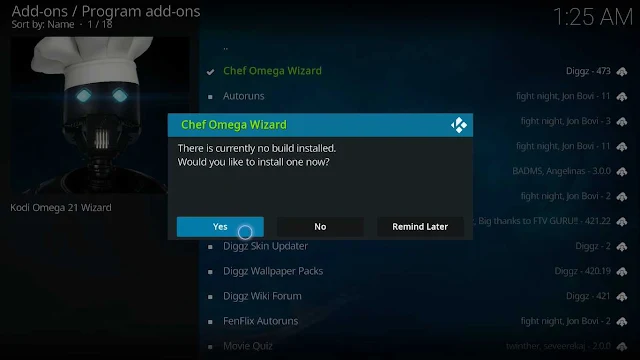
- Wait a few minutes for “The Chef Omega Wizard Add-on installed” message to appear.
- Select Yes to enter the Diggz Builds List.
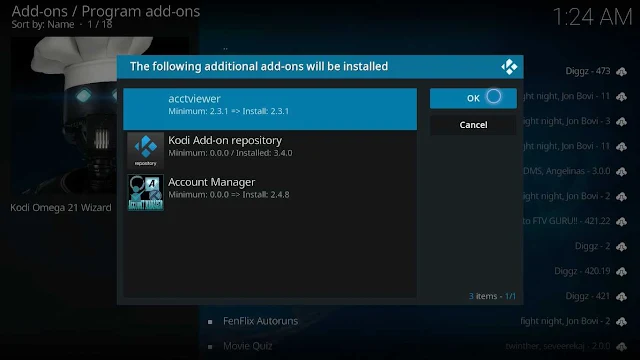
- Select Ok to install the additional addons.
- Choose Diggz Xenon Kodi Build

- Select Continue

- Wait for the Xenon build to download

- Wait for the Extracting files.

- Once the download is complete, reopen Kodi from the Home menu
- That’s it! The diggz xenon nexus build is now successfully installed.

- Once at the main screen make sure to allow the menus to build and add-ons to install. This may take a few minutes so be patient.
How to Update Diggz Xenon Build?
- If you still don't get the update, here is what you need to do.
- Go to the Addons section and select install from repository.
- Find the Diggz Repository and click on it.
- Select Program Addons.
- Click on Chef Nexus Wizard.
- Select Auto Update and tick on it to install the new version of xenon kodi build when it's available.
- you can also know what version of diggz xenon build you have by clicking on Configure, and check the installed version, also you can disable update notification from there.